
Homebrew is the best source for open source software yet, and makes installation easy. Here’s what Homebrew is, how it works, and how to use a graphical interface with the service to make it even easier.
Before Homebrew came along, the Mac was polished on the outside and messy underneath. Installing software meant dragging icons or unpacking files by hand, and the command line was something most users avoided.
Developers knew macOS had real Unix power hidden inside, but Apple never gave them a simple way to use it. The tools existed but weren’t connected.
That changed in 2009 when a developer named Max Howell wrote a small script called Homebrew. It let users install almost anything with one short command. Over time, it grew from a developer’s shortcut into one of the most useful tools on the Mac.
Today, Homebrew isn’t just for programmers. With a few friendly graphical apps, anyone can use it to manage software and keep their Mac organized with almost no effort.
The problem before Homebrew
In the early 2000s, macOS was capable, yet frustrating. It had a Unix foundation but no good built-in way to download and install command-line tools. Linux had APT and Yum, systems that handled updates and dependencies automatically. But macOS users had to do everything manually.
Two community projects tried to fill the gap — Fink and MacPorts. They worked, but they weren’t simple.
Fink duplicated system libraries, which wasted space and sometimes caused conflicts. MacPorts insisted on compiling everything from source, which meant long waits for even basic installations.
Both systems assumed their users were comfortable deep in the command line, which wasn’t always the case.
Most Mac owners weren’t familiar with the process. Installing a single utility often required dozens of commands, and removing it didn’t always clean up properly.
By the late 2000s, Mac developers were looking for a simpler way to install and manage software. Around the same time, Apple’s attention had turned toward the fast-growing iPhone platform.
Birth of the project
Max Howell started Homebrew in 2009 to make installing software on macOS simple and safe. His goal was to give users control without the usual confusion or risk.
Howell wrote it in Ruby, a language popular among Mac and web developers, and kept the design lightweight. Homebrew used Apple’s existing libraries instead of replacing them, stored its files in predictable locations, and could undo changes cleanly.
Each application was defined by a short Ruby script called a formula. The script told Homebrew where to find the software, how to build it, and how to install it. Typing brew install followed by a name did everything automatically.
Even the name “Homebrew” captured its spirit. It suggested experimentation, independence, and comfort with tinkering. The beer-themed terms — taps, bottles, and cellars — gave the project a playful personality.
Within months, it had spread across GitHub and into developer communities worldwide. What made it different was how Homebrew respected the way macOS worked instead of trying to make it behave like Linux.
Growing into the Mac ecosystem
Homebrew grew quickly thanks to its simple design. By 2010, it was widely used on GitHub. Developers added new formulae and fixed many bugs, and also translated the documentation for global use.
In 2013, Howell gave the project to the community and moved into its own GitHub group for maintenance. Version 1.0 arrived in 2016, signaling that Homebrew was stable enough for daily use.
By then it had effectively replaced older managers like Fink and MacPorts. Most developers simply used Homebrew by default. The biggest leap came in 2018 with the integration of Homebrew Cask.
It extended the system to install full macOS apps, from Firefox to Visual Studio Code, using the same simple command. For the first time, you could manage both command-line tools and desktop applications in one place.
In 2019, the team merged Homebrew with Linuxbrew, making it work across both platforms. When Apple introduced Apple Silicon Macs in 2020, Homebrew adapted again.
Version 3.0 added native support for the new architecture in early 2021. It used a dedicated path at /opt/homebrew to keep everything cleanly separated from older Intel installations.
Each of those updates made Homebrew more approachable and reliable. What began as a tool for developers had become something every Mac user could benefit from.
Under the hood
Homebrew runs on principles that make it safe and predictable. When you install it, the system clones a Git repository that holds its core files and package formulas.
Every update is a small Git pull that keeps the library current without rewriting your system.
Each package lives in its own folder inside the Cellar, the directory where all installed packages are stored. Homebrew links its executables into a shared bin path so they’re easy to access.
If you remove something, the links and files disappear cleanly, and nothing touches protected parts of macOS. Homebrew also recognizes that most users don’t want to build software manually.
It uses precompiled binaries called bottles for common packages, which install in seconds. For advanced users, it can still compile from source, but it’s optional.
The Homebrew Cask system handles full Mac apps the same way. It downloads installers, places the apps in the Applications folder, and can update or remove them automatically.
The experience is simple enough that many users install their everyday software through Cask instead of dragging icons by hand.
Behind the scenes, everything remains text-based and version-controlled, which means it’s transparent. You can see what’s being installed, where it goes, and how to remove it.
For beginners
Homebrew can look intimidating at first glance, but it’s designed to be friendly once you understand the basics.
The Terminal might seem like a developer’s tool, yet Homebrew turns it into something almost anyone can use.
You type a short command — brew install followed by the name of the software — and Homebrew takes care of everything. It finds the package, checks it, installs it, and makes it available immediately.
Installing Homebrew
You can update it later with brew upgrade or remove it with brew uninstall. Nothing is hidden, and every step can be undone. Beginners often start with familiar tools like Git or Python.
Installing either one shows how smooth the process is compared to manual downloads. Once you’ve done it a few times, the Terminal starts to feel less like a wall of text and more like a shortcut.
Not everyone wants to type commands, which is why graphical versions of Homebrew exist. These versions provide the same control through a simple point-and-click interface.
You can view installed apps, check for updates, or remove old software without using the command line. These interfaces make Homebrew approachable for anyone who prefers visual feedback over text — which is likely everyone.
Several graphical interfaces now build on top of Homebrew, each focused on ease of use. They don’t replace Homebrew or change how it works. Instead, they give users a window into the same reliable system.
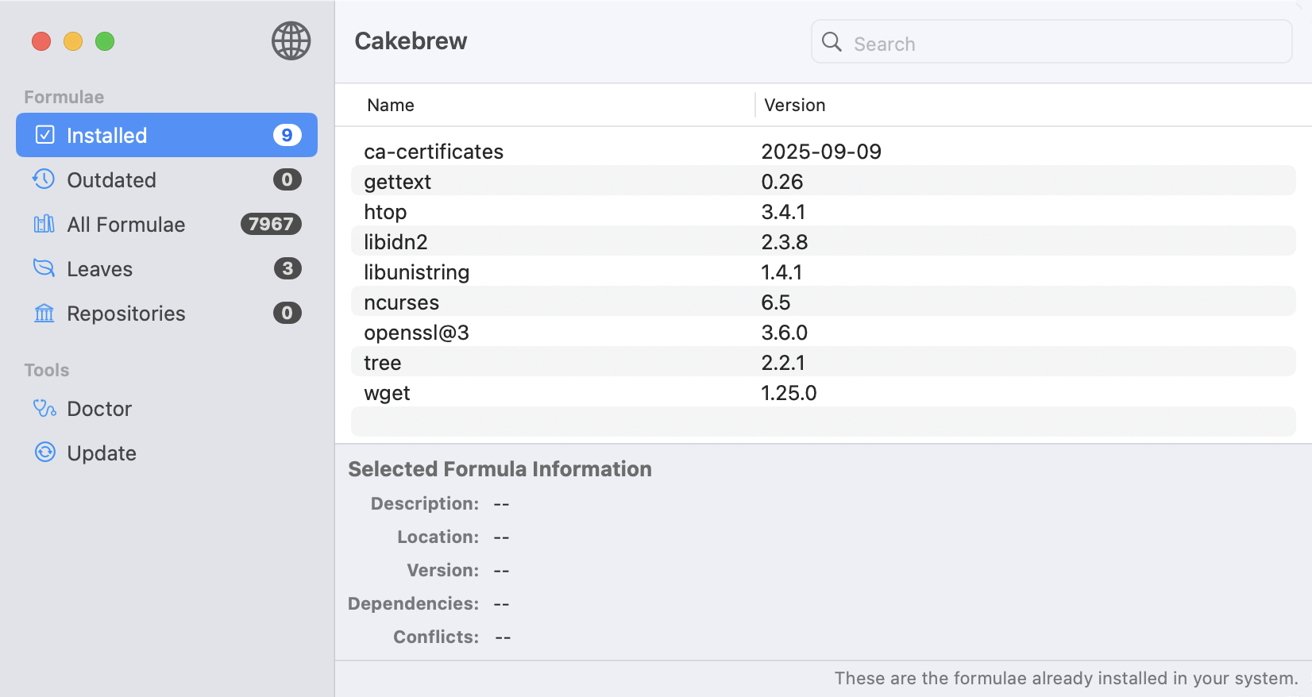
The first major one was Cakebrew, a clean and straightforward app that displayed installed packages, available updates, and system health checks. It could run maintenance tools like brew doctor and brew cleanup with one click.
Cakebrew
Cakebrew made Homebrew feel less mysterious for newcomers. Alas, development slowed after 2021 and it no longer works reliably on newer versions of macOS.
A smaller tool called Brewery focused on installing and uninstalling software only. It lacked Cakebrew’s polish, but it proved how useful a graphical layer could be.
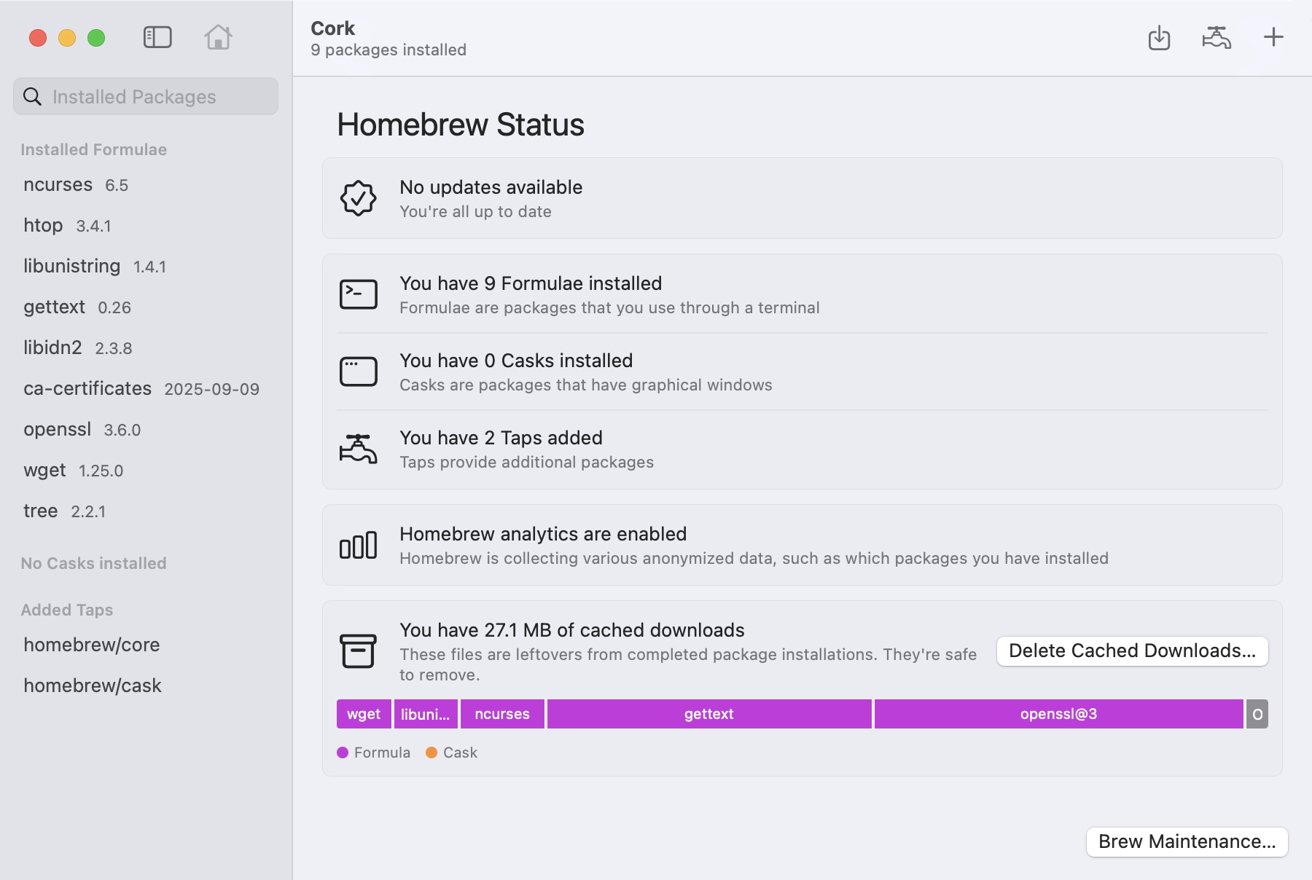
Today, the most capable option is Cork, built in SwiftUI and designed for Apple Silicon Macs. Cork loads quickly, shows dependencies in a visual tree, and includes a menu bar utility for updates.
It combines a Mac-like design with the full power of Homebrew underneath.
Two others, BrewMate and Applite, specialize in managing Mac apps installed through Homebrew Cask. BrewMate feels like a lightweight App Store, while Applite focuses on privacy and simplicity.
Cork
Both are ideal for people who just want to install or update regular apps rather than developer tools.
Getting started with Homebrew on Mac
Before you dive in, it helps to see how easy Homebrew actually is to set up. You don’t need to know much about the Terminal or spend time tweaking system settings. A few steps are all it takes to get Homebrew running on your Mac.
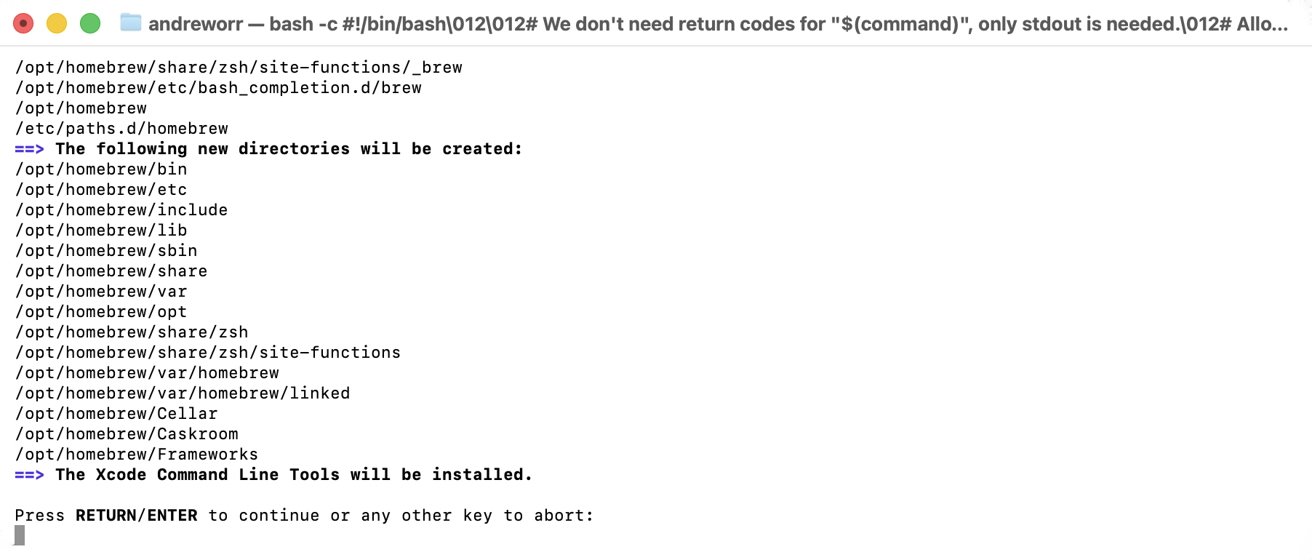
- Open the Terminal app.
- Visit brew.sh, the official website.
- Copy the single command provided on the website.
- Paste the command in the Terminal.
- Press Return.
- Enter your password when asked.
- Let the installer do the rest.
Once the installation finishes, run brew doctor. If the message says “Your system is ready to brew,” you’re all set. You can now install your first package— try brew install git or brew install python— to see how it works.
If you’re using a Mac with Apple Silicon, Homebrew installs under /opt/homebrew, while Intel-based Macs use /usr/local. You don’t have to adjust anything, but knowing the difference can help if you ever move files manually or sync between machines.
You can keep your setup current with a few simple commands.
brew updateto refresh the formula listbrew upgradeto update installed toolsbrew cleanupto remove outdated versions
That’s all most users ever need.
If you prefer not to use the Terminal, download Cork or another GUI from its GitHub page. Open it, let it detect your installation, and start exploring. You can browse available software, install new tools, or remove old ones with a few clicks.
Once you’re comfortable, you can mix both approaches. Many users start with a graphical app, then switch to the Terminal for speed once they understand the commands.
Over time, you’ll find that Homebrew simplifies installs and keeps your Mac cleaner. Every program lives in its own place, updates are consistent, and nothing clutters your system folders. It’s a small tool that quietly makes the Mac more capable.
What Homebrew means today
Homebrew started as a workaround for developers who wanted more control over their Macs. Fifteen years later, it’s become part of the system’s identity. It gives users power without complication and turns the command line into something anyone can learn.
It also stands as proof of what community-driven software can accomplish. Homebrew isn’t owned by a company, yet it’s maintained with the precision and reliability of one.
When Apple updates macOS or moves to new hardware, Homebrew adapts almost immediately, keeping users connected to the tools they depend on.
With a graphical app like Cork, beginners can handle installations and updates in minutes, no coding required. For developers, it’s the invisible backbone of every project environment they set up.
Homebrew bridges Apple’s simplicity and the open-source community’s flexibility. It gives the Mac an edge that few people notice until they need it.
Trending Products

Apple iPhone 12 Mini – Parent...

Apple iPhone SE 2nd Gen – Par...

Apple iPhone 7 32GB Unlocked AT&...

Apple iPhone 14 – Parent (Ren...

Apple iPhone 12 Pro Max, PARENT (Re...

Apple iPhone 8 64GB Unlocked –...

Apple iPhone 15 Plus 5G (512GB, 6GB...

Apple iPhone 14 Pro (Renewed)

Apple iPhone 15 Pro Max – Par...
